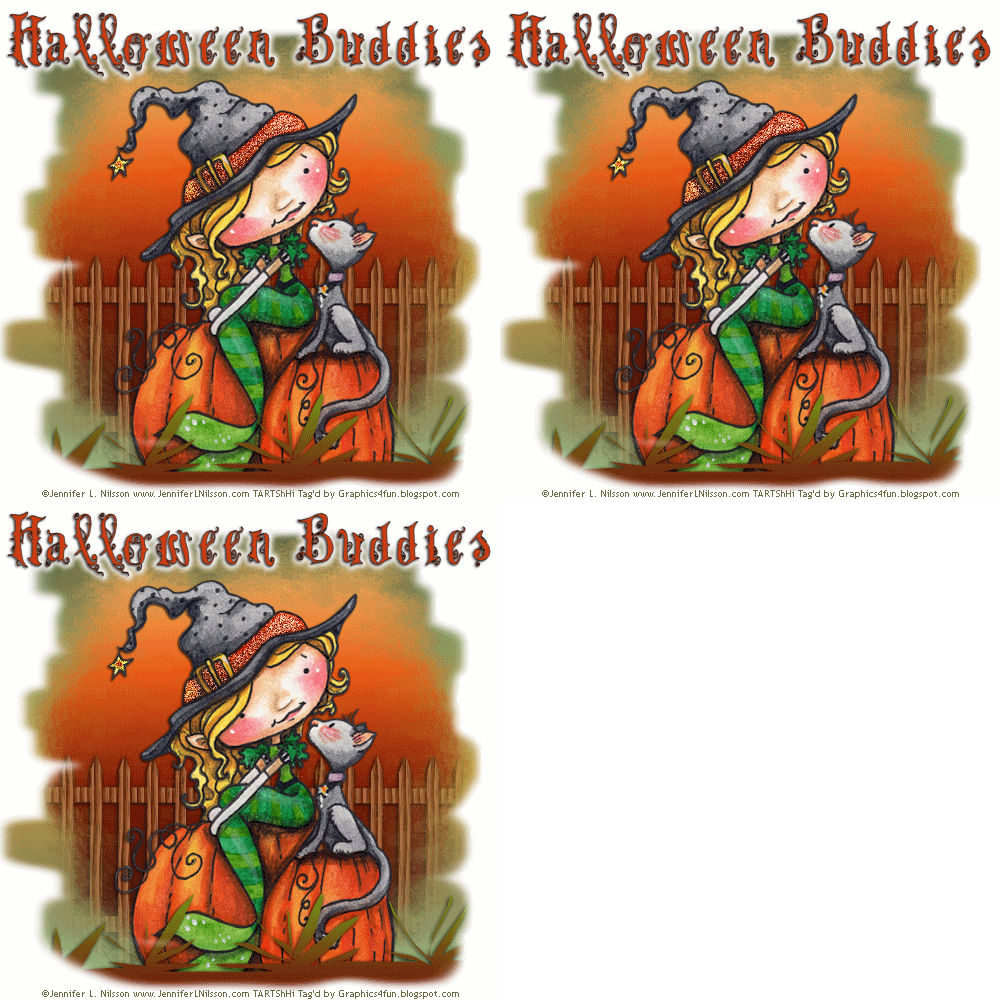
Halloween Buddies

Created Oct 22, 2011 © Graphics4Fun PSP Tutorials
Property of Graphics4Fun PSP Tutorials
This is my creation, any similarity to other tutorials on the Internet is unintentional.
Please do not copy or place this tutorial or any of the supplies to any other place without written permission directly from me. Thank you.
This tutorial is written in and for PSP X2 and assumes you have a working knowledge of PSP but is suitable for a beginner who HAS experience in PSP and AS.
Please use my tutorial as a guideline and you are encouraged to try your own ideas. Remember to save your work often.
Items needed for this tutorial:
1. Jennifer Nilsson Tube (or one of your choice) You must have a license to use her tubes. This one can purchased from MyTagArt.com (available for 88-cents until Oct 31st!) here Be sure to visit her website, JenniferNilsson.com
2. Animation Shop
3. Filters: Eye Candy 6 Gradient Glow by Alien Skin Free Trial
4. Font: VTKS Dear Love
5. My Supplies (Here)
Supplies Include:
* Layer 1-Background
** Layer 2-Green Overlay
***Layer 4-Grass with white mask
Lets Start:
Download and unzip the Supplies.
In PSP:
Open Layer 1, the Background layer.
Open Layer 2, the Green Overlay (close off Layer 1 background after c/p over Layer 1), Copy and Paste as a new layer over Layer 1.
Open your tube, select top layer (tube only), and resize 80%. Copy and paste as a new layer over the other 2 layers. Move the tube to the center Vertically and down 280-pixels Horizontally. This is Layer 3.
(Layer 3). Apply drop shadow using these settings (same settings to be used on your text):
Effects ---> Drop Shadow Settings
Offset: Vertical 1, Horizontal -1
Attributes: Opacity 84, Blur 3, Color Black
Open Layer 4, Grass and mask (delete after c/p over layers) Copy and Paste as a new layer.
At this point, I apply my Credits and merge all so when I start making my text layer, I am done with the credits, but, you do it however you are most comfortable with. I find this works for me.
[NOTE: If you do not want to make an animated tag, stop here, follow the steps for the text below, merge all and you are done.]
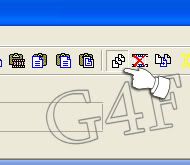
Merge all the layers, copy and take to Animation Shop, paste as a new animation and duplicate until you have 3 frames. Then go to Edit ---> Select all. This puts a blue box around the frames, with a red box indicating the frame group's starting point. Make sure the Propagate Paste button has been triggered.
Now to create the glitter in her hat. Go back to PSP to your tag.
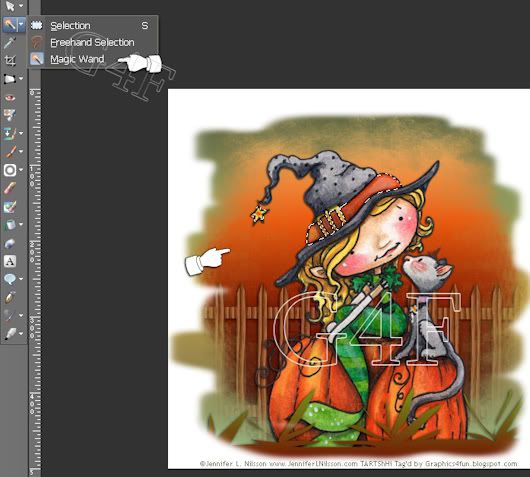
Go to the Selection tool --> Magic Wand. Settings: Mode: Replace; Match mode: RGB Value; Tolerance: 45; Contiguous checked; Feather: 2; Anti-alias not checked.
While holding down the Shift key, select the sections of the band around her hat and the little star.

Once done, release the shift key and copy and paste as a New Image. This opens a separate area.
Duplicate this so that you have 3 layers, original and 2 copies. I renamed the layers simply 1, 2, 3 but, you go as you will.
Now select layer 1, from the top menu select Adjust ---> Add/Remove noise ---> add Noise
Settings: Random, Moncohrome, Noise 75%
Select layer 2, repeat steps but change only the Noise to 85%
Select layer 3, repeat steps changing the Noise to 80%
Go to File ---> Save copy as ---> PSP Animation Shop file (*.psp). I named mine Glitter.

Open Animation Shop, open the file (you should have 3 frames) go to Edit ---> Select all ---> Copy. Go back to the Tag grouping (we are still in Animation Shop) and select Edit ---> Paste ---> Into Selected Frame (the frame with the red box).
Once you position it, let go and it should paste into the other 2 frames as well. (If not, check to see if your propagate paste button is selected. Chances are it is not. Go back to Edit and Undo Paste. Select the PP Button, go back to Edit ---> Paste ---> Into Selected Frame.
At this point, I save my base tag as a .mng file in case of a crash and also because at a later date I can open this and add different text, should I want to. To save as a ".mng" file, while still in AS, go to File ---> Save as. When the box opens, put the name you want for the file and from the drop down menu, find "Animation Shop Animation" (*.mng) and save.
Now for the Text
We go back to PSP
If you haven't already, go to Selections on the top menu and click "Select none" to get rid of the dancing lines around the hat band.
Create a New Layer, select the text tool and click on the tag. A text window opens and type "Halloween Buddies" (or anything you want). I select my text and find the font we are using, VTKS Dear Love with these settings: Size: 50pts, Alignment: Center, Anti-alias: smooth, Kerning 75.
If it isn't centerd like you want, go to "Object" (top menu), ---> Align ---> Horz. center on canvas. This is just to get a view of where to paste it in Animation Shop.
(NOTE: If you are not making the animated version, then you can repeat the text steps making sure to add the drop shadow and the gradient glow steps below for your name as well, merge all and you are finished)
Apply Drop Shadow using the same settings as for the tube.
Apply filter effects:
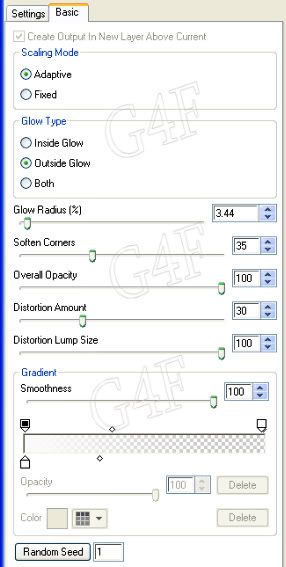
Gradient Glow: Under the Setting tab, select "Complex Thin" then Ghost Text. Now select the Basics tab and apply these settings.
Copy this text and carry back to Animation Shop, paste as New animation, and copy. Open your tag frames and go to Edit---> Paste ---> Into Selected Frame. Repeat the text steps for your name, placing it at the bottom, or where ever you want.
Go to File --> Save as and when the box opens, name it and select the ".gif" extention.
Finish!
I hope you found this tutorial easy and fun. Please leave a comment and let me know.
Sherry, aka Graphics4Fun
*Used for Layer 1
ElvenSword Gradients for PSP, Autumn 04, Autumn Gradients
Mask DMSK0886
-----------
**Used for Layer 2
Corel Gradient Earth04
MASK 146 by Aqua Rebel:
---------
***Layer 4-My creations, Mask and Grass.The grass I vectored freehand. Both were items created just for this tag
------------
By using any item from this Blog, you agree to the TOU.


No comments:
Post a Comment
Please leave some luv! :-)
Thank you