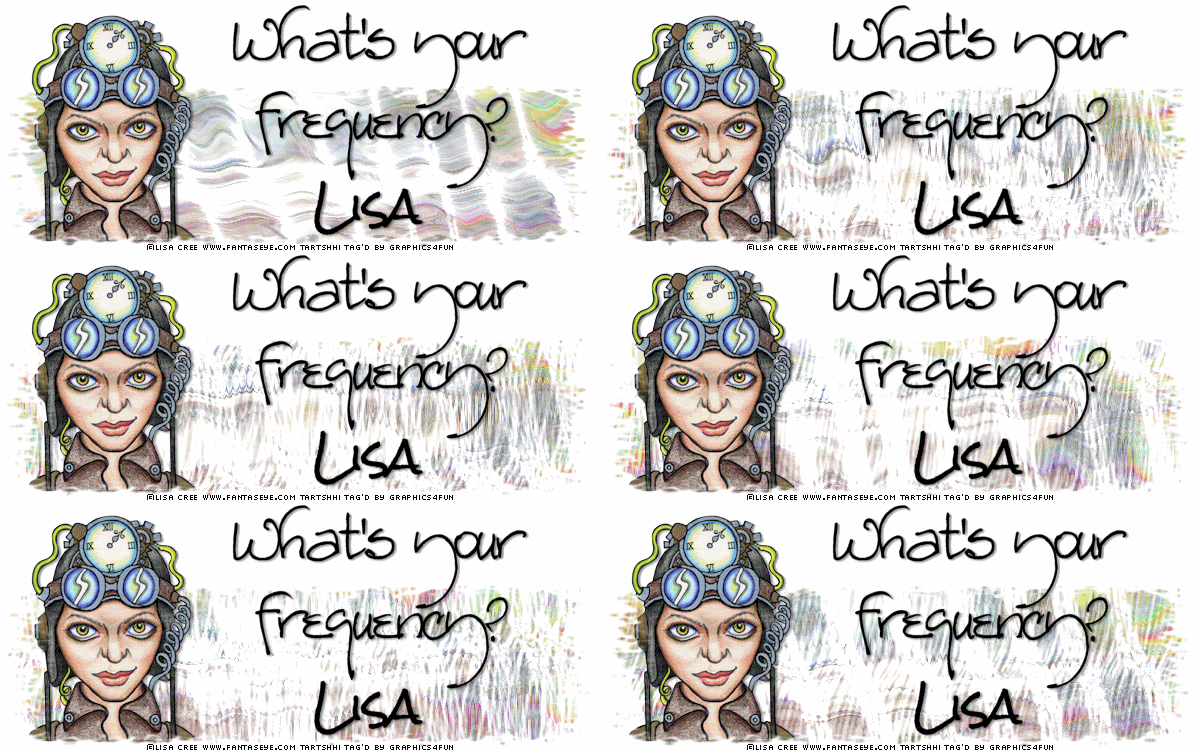
This tutorial was created Oct 15, 2011 ©Graphics4Fun PSP Tutorials
and is property of Graphics4Fun PSP Tutorials. This is my creation, any similarity to other tutorials on the Internet is unintentional. Please do not copy or place this tutorial or any graphics to any other site without written permission directly from me. Thank you.
This tutorial is written in and for PSP X2 and can be used by anyone with a basic understanding. I have tried to explain the steps enough so that someone with even just a little bit of knowledge of Animation Shop and PSP could manage. This is a NO SCRAPS tutorial.
Please use my tutorial as a guideline as you are encouraged to try your own ideas. A few of the screenshots are large but if you click them, they should open to a new window so that you can see the entire image.
Items used for this tutorial include
Tube of your choice, I used a PTU tube of Lisa Cree found at MyTagArt.com.You will need a license to use her work. Lisa's personal website Fantaseye.com is down at the moment while being updated but you can visit her at http://fantaseye.deviantART.com
Filters: Xero Lithograph and Alien Skin Eye Candy 6 Textures
Mask. DMSK 0957 (http://freetubes.com/artxyz/masks/dmsk0957.jpg)
Fonts
For phrase: Redstar
For Name: Rock Salt
JASC Animation Shop 3
Let's start
Open 2 canvases 1) 600x250 siggy tag, 2) 150x150 for the avatar
Prepare Background
First, we are going to prepare a filtered background layer for the tag by opening your tube, copy image with background and paste as a new image. (This will automatically create a separate area, not to be confused with your 600x250 tag.) We will apply all the filters and then copy and paste the result on top of your tag .
Apply Filters:
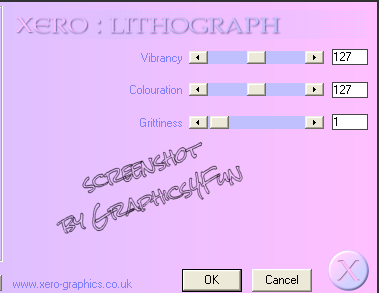
Xero Lithograph
Settings:
Vibrancy 127
Coloruation 127
Grittness 1
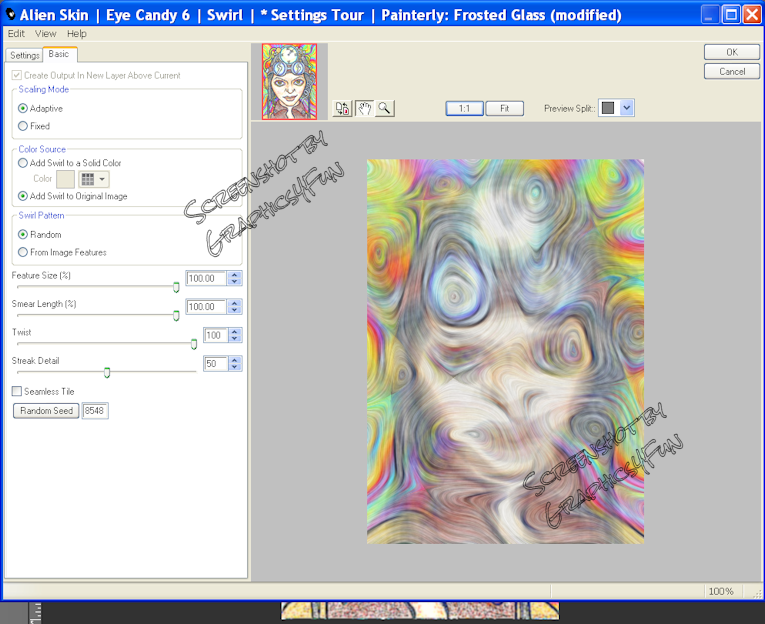
Eye Candy 6 texture, these settings:
Scaling Mode: Adaptive
Add to original image
Feature size: 100
Smear length: 100
Twist: 100
Streak: 50
Random seed: 8548
Now to work with the tag
1) SIGGY TAG:
Flood fill canvas with white.
Copy and Paste the filtered image as a new layer to your tag and stretch it to cover the tag's dimension.
--->[NOTE: At this point, I go to the Selection tools, select the "Square" and pick out an area of the swirly background I would like to be the background for the avatar. I select an area about 155x155, Copy, then paste it onto the avatar canvas as a New Image, and go back to the tag,. forgetting about this for the time.]
Select the swirly layer and lower the top 85 pixels down or about 1/3. You should see the white layer below. Now create a 3rd layer by creating a New Layer and flood fill it with white.
Tick your top layer to select it and add your Mask with these settings:
Fit to layer
Invert transparency, hide all mask
Create mask from Source luminance
Go to Layers ---> Merge ---> Merge group
Lower the Mask layer to the same position as the filtered image layer.
Tick the mask layer so as to close/hide it.
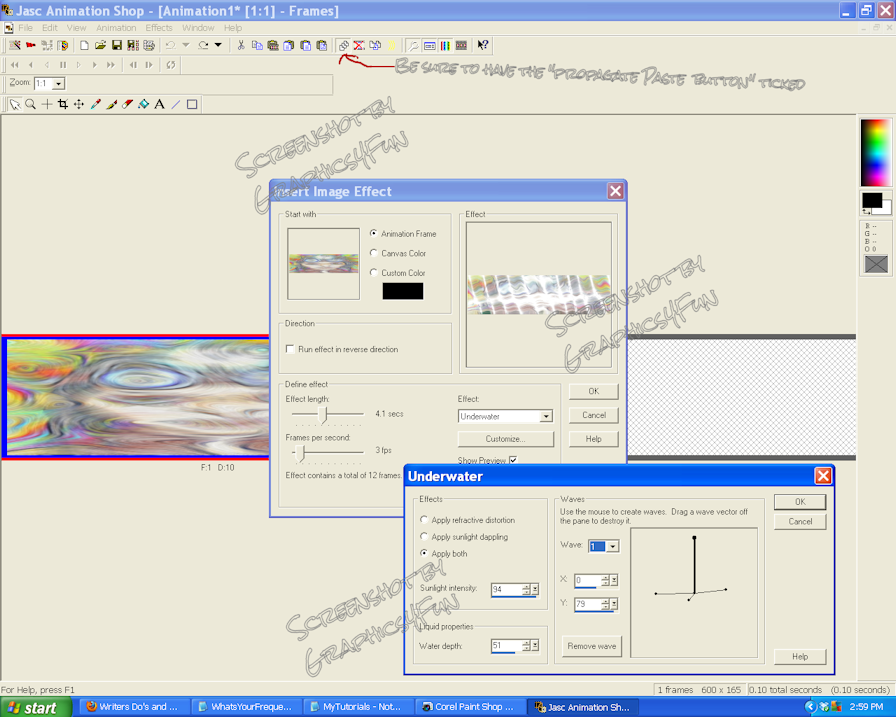
Select the swirly layer, copy and paste into Animation Shop, select Effects --->Insert Image Effect ---> Underwater and use these settings:
Animation Frame
Effect 4.1
Frames per second 3
Select "Underwater"
Effects: "Apply Both", Sunlight Intensity: 94
Liquid Properties: Water Depth: 51
and add 5 waves:
Wave 1:
X: 0
Y: 79
Wave 2:
X: 0
Y: 0
Wave 3:
X: -56
Y: -1
Wave 4:
X: 46
Y: 5
Wave 5:
X: -8
Y: -10
You will have 13 frames, delete the first frame which is the original frame. Now you have 12 frames. Leave it and return to PSP.
Select your Mask layer, duplicate it.
Go to your tube, select the image without the background and resize it 46%. Copy and paste as a new layer. Move to the left to where you want it. I placed it at about 110 pixels from the left end of the canvas.
Apply Drop Shadow:
Offset Vertical: 1; Horizonal: 2
Attributes: Opacity: 45; Blur: 2.90 Color; black
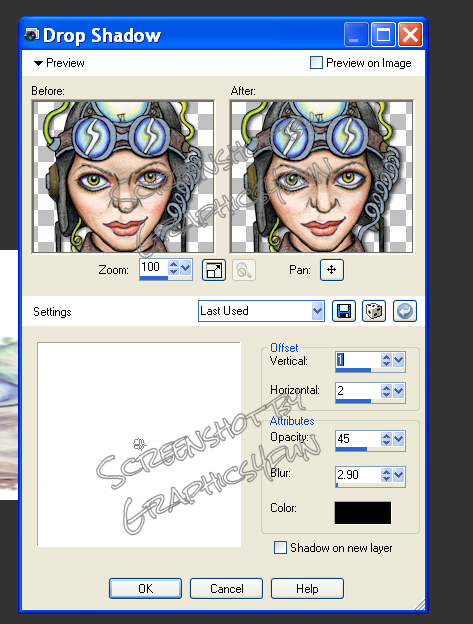
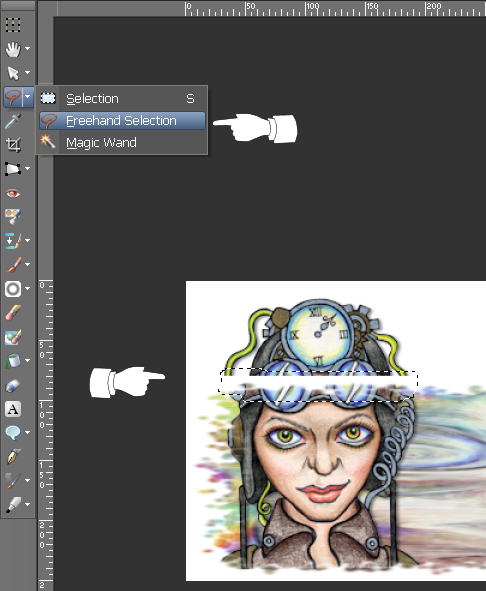
Grab the image layer and drag it in between the two mask layers. Select the top layer. Go to the Freehand Selection Tool and select the lasso. Go around only the area of the top mask that crosses the face of the tube. Once you are done, go to Edit then Cut. Then go to top menu, Selections --> Select None to get rid of the dotted outline.
Now, select the bottom background layer (white) and copy & paste it into Animation Shop, duplicate it until you have 12 frames. Go back to the first frame and click it, then go up to Edit and then Select All.
Now minimize that group of white frames, open the group of frames with the underwater effect, go to the first frame and click it, then go to Edit, --->Select All,---> Copy. Minimize this group and open the white frames. There should still be a blue highlighted box around them with the first frame having a red box. Go to Edit,--> Paste, ---> Into selected frame. This will be the frame with the red box. It may take a few tries to get it centered between the two ends and on the bottom. Don't let go until you have it where you want it as it will be duplicated into the exact same point in all the frames. If there is no duplicated effect, go to Edit, --> Undo Paste, which will remove it from the frame, then make sure the little Propagate Paste Button is selected, go back to Edit ---> Paste---> Into selected frame.

Go back to PSP, I now add my credits using Pixelette Font size 8, anti-alias off.
I hide the white background layer and the swirly background layer and select one of the other layers, then from the top menu select Layers-->Merge---->Merge Visible. I select the merged layer, copy and take to AS and past as New Animation. Then copy and paste into the 12 frame group.
I view the animation and if I am satisfied, I now save this as "BasicTag" as a ".mng file", in case I have a crash.
Now for the words.
At this point, you no longer need the two backgrounds but I keep them to judge the placement of the phrase and the name.
Create a new layer and click the text tool, and open a text box by clicking on the tag.
Type "What's your in the text box.
frequency?"
I used these settings:
Font: Redstar , 48-pts, Middle alignment; anti-alias: Smooth, Stroke: 1.0; Leading: -0.300; Kerning: -25

Apply Drop Shadow:
Offset Vertical: 1; Horizonal: 2
Attributes: Opacity: 45; Blur: 2.90 Color; black
Copy and Paste layer into Animation Shop as a new animation, copy and paste into the tag base, positioning it as you want. You now have the tag base with text and are ready to add your name.
Go back to PSP, add a new layer, type your name using the Rock Salt font, 48 pts.
If your name is long, you can adjust the size to work for you. Apply Drop Shadow using the same drop shadow settings as before.
Copy and Paste layer into Animation Shop as a new animation, copy and paste into the tag base, positioning it as you want. Save as gif.
2) AVATAR
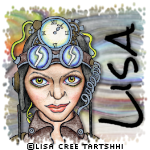
Go back to your avatar. You have the swirly background as a layer. Create a new layer, flood fill white, add mask using the same setting above, go to Layers ---> Merge ---> Merge Group, Grab your resized tube image and paste as a new layer, adjusting the size to fit the avatar. Add drop shadow and drag the tube below the mask layer, making sure the bottom of the tube is coverd by the mask layer but NOT the top. Add your credits, go to Layers ---> Merge ---> Merge All. Now go to the top menu and select Image -- rotate right. Add a text layer and add your name using the Rock Salt font. I used the 40pt setting to make the word fit. Use the same settings for the drop shadow. Merge all and the select image again and rotate left. Save as a png or jpg.
You're done! Congratulations!
Tutorial written and created by Sherry Hightower a.k.a. Graphics4Fun.
By using any item from this Blog, you agree to the TOU. If you enjoyed this tutorial, please leave a comment and let me know. If you found it difficult to follow, I would appreciate your feedback as to how I could have written it better or clearer. Thank you for visiting my Blog.

Thanks Sherry! <3
ReplyDelete